
How To Build A Garden Pond In 5 Easy Steps

How to Build a Pond?
A backyard pond is more than just a beautiful addition to your garden—it’s a thriving ecosystem that enhances your outdoor space. The gentle ripple of water, the reflection of the sky, and the presence of wildlife create a serene, natural retreat right in your yard.
Beyond aesthetics, ponds play an essential role in supporting biodiversity. They provide a habitat for birds, amphibians, and beneficial insects like dragonflies, which help control garden pests. A well-designed pond can also improve water retention in your landscape and contribute to a healthier environment.
This guide breaks down pond construction into five simple steps, making it easy for beginners to create a stunning and functional water feature. We’ll also cover how to use natural stone edging to give your pond a polished, professional finish.
Step 1: Plan and Mark the Pond
Choose the Best Location for the pond
Selecting the right spot for your pond is the key to long-term success. Consider these factors:
Sunlight Exposure: Choose a location with 4–6 hours of sunlight per day. This balance promotes plant growth while preventing excessive algae buildup.
Avoid Tree-Covered Areas: Fallen leaves can decompose in the water, leading to maintenance issues and poor water quality.
Check for Underground Utilities: Before digging, ensure there are no buried cables, pipes, or drainage systems in the area.
Mark the Pond Shape
Once you’ve found the perfect location, define the shape of your pond:
Use a Hose, Rope, or Chalk: Outline the perimeter directly on the ground to visualize the size and layout.
Opt for a Natural, Irregular Shape: A pond with shallow zones (≤30 cm) along the edges creates a more wildlife-friendly environment, offering easy access for frogs, birds, and insects.
Check Ground Levelling
An uneven pond can lead to water drainage issues and an unbalanced appearance. To ensure proper levelling:
Place a spirit level on a straight board and check different points around the outlined shape.
Adjust the soil as needed before you start digging to prevent future water imbalances.
Taking the time to carefully plan and mark your pond will lay the foundation for a successful and low-maintenance water feature.
Step 2: Excavate the Pond
Digging the Pond
Now that your pond’s shape is marked, it’s time to start digging. The key to a stable, functional pond is creating depth variations that support plant life and, if desired, fish.
Start with the Perimeter: Begin by excavating along the marked outline.
Create a Shallow Shelf (≤35 cm): This marginal zone is ideal for aquatic plants, providing habitat for wildlife while enhancing the pond’s aesthetics.
Dig Deeper Zones (Up to 60 cm): If you plan to introduce fish, ensure there’s a deeper section where they can retreat during extreme temperatures.
Slope the Edges
Gradual slopes prevent soil from collapsing into the pond over time.
A sloped edge also helps with stone edging, allowing rocks to sit securely without shifting.
Remove Debris
Clear away any sharp rocks, roots, or hard debris that could puncture the pond liner.
For extra protection, tamp down the soil and smooth uneven areas before installing the liner.
Step 3: Install the Liner and Underlay
Add Protective Underlay
Before placing the liner, a protective layer helps prevent punctures and extends its lifespan. Consider these options:
Old Carpet – A budget-friendly choice that provides decent padding.
Geotextile Fabric – Designed specifically for pond construction, offering superior durability.
Rubberized Underlay – Highly flexible and resilient against ground shifts.
Lay the underlay evenly across the excavated area, covering all surfaces.
Place and Secure the Liner
EPDM Liner Recommended: This flexible, UV-resistant liner is durable and long-lasting.
Smooth Out Folds: Gently adjust the liner, pressing it into the contours of the pond.
Use Temporary Weights: Large stones or bricks can help hold it in place while filling.
Trim Excess Liner
Leave about 30 cm of extra liner around the perimeter.
This extra material will be essential for securing the stone edging in the final step.
Step 4: Edge the Pond with Stones
Choose the Right Stones
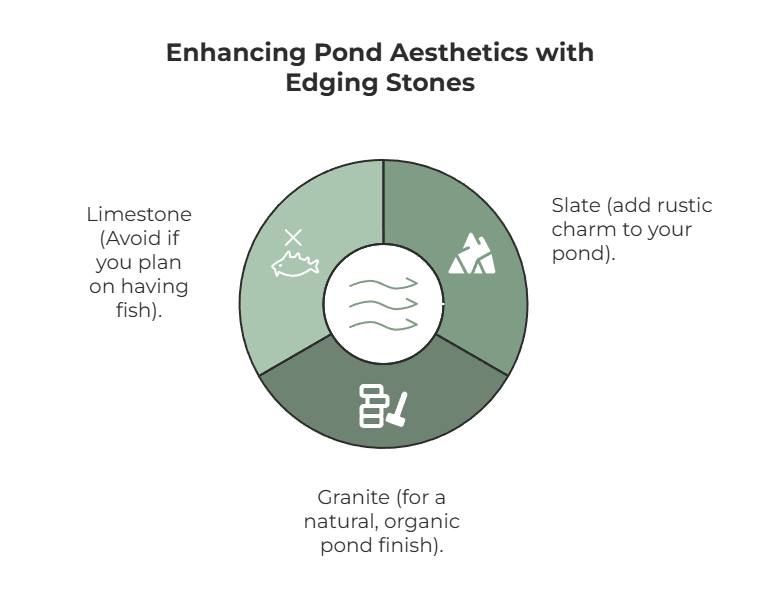
The right stone edging not only enhances the natural beauty of your pond but also secures the liner and integrates the pond into your garden landscape. Consider the following options:
Slate to add rustic charm to your pond.
Granite for a natural, organic pond finish.
Avoid limestone if you plan to add fish, as it can alter the water’s pH levels.
Arrange the Stones
To create a polished and sturdy edge:
Place larger rocks first – These serve as the structural frame, anchoring the liner in place.
Fill gaps with pebbles or gravel – This ensures a smooth transition between the water and surrounding landscape.
Overlap the liner – The stones should extend slightly over the pond’s edge to fully conceal the liner and create a seamless look.
Stabilize the Edging
Use sand or mortar to secure stones in place, especially on sloped edges.
Avoid chemical-based cement that could leach into the water and harm aquatic life.
Step 5: Fill and Finalize
Fill with Rainwater
Using rainwater instead of tap water is ideal because it:
Reduces chlorine exposure, which can be harmful to fish and plants.
Better mimics a natural ecosystem, supporting biodiversity.
If using tap water, let it sit for 24–48 hours before adding plants or wildlife to allow chlorine to dissipate.
Add Aquatic Plants
Aquatic plants oxygenate the water, provide shade, and create habitats for wildlife. Consider:
Water lilies – Add beauty and provide cover for fish.
Reeds and rushes – Help filter the water and prevent algae growth.
Native aquatic plants – Support local biodiversity and require less maintenance.
Enhance with Features (Optional)
For added aesthetic and functional benefits, consider:
A submersible pump – Helps with water circulation, keeping the pond healthy.
A slate rock waterfall – Adds movement, oxygenates the water, and creates a relaxing ambiance.
With these final touches, your pond is complete—ready to support wildlife, enhance your garden, and provide a peaceful retreat for years to come.

Conclusion
Building a pond is a rewarding project that transforms your outdoor space into a thriving ecosystem.
Let’s recap the five simple steps for building a pond:
Plan and Mark the Pond – Choose the right location, shape, and ensure proper leveling.
Excavate the Pond – Dig out the area, create shelves for plants, and slope the edges for stability.
Install the Liner and Underlay – Protect the liner with an underlay, secure it properly, and trim any excess.
Edge the Pond with Stones – Select natural stones, arrange them securely, and create a seamless transition to the landscape.
Fill and Finalize – Use rainwater, introduce aquatic plants, and enhance with optional features like a waterfall or pump.
By following these steps, you’ll create a beautiful, low-maintenance water feature that supports local wildlife and adds a touch of serenity to your garden. Whether you’re drawn to the gentle ripple of water, the sight of dragonflies hovering above, or the lush greenery of aquatic plants, a stone-edged pond is a fantastic addition to any outdoor space.
Frequently Asked Questions (FAQ)
-
For a natural look, choose slate or granite pond stone edging. These stones blend well with the landscape and create a stable edge. Avoid using limestone if you plan to introduce fish, as it can alter the water's pH levels. Make sure the stones overlap the liner to conceal the edges and give your pond a polished finish.
-
For fish, the pond should have at least one deep zone of 60 cm to provide a safe space for them during temperature fluctuations. Shallow areas (≤30 cm) are great for plants and wildlife, but deeper zones are essential for fish survival.
-
While tap water can be used, it contains chlorine, which can harm aquatic life. If you must use tap water, let it sit for 24-48 hours to allow the chlorine to dissipate. Rainwater is a better option as it’s more natural and safer for the pond’s ecosystem.
-
Water lilies, reeds, rushes, and native aquatic plants are excellent choices. These plants help oxygenate the water, prevent algae growth, and create habitats for wildlife. Native species are ideal as they require less maintenance and support local ecosystems.
-
To prevent algae growth, ensure your pond has plenty of aquatic plants to compete for nutrients. Also, limit direct sunlight exposure to the pond by planting surrounding vegetation or using pond netting. A submersible pump or water feature can also help with circulation, keeping water moving and preventing stagnation.